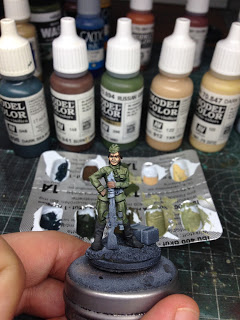
As this miniature was started as part of a painting jam with a few friends in my basement, I didn’t take any pictures of the first steps, except the first one below. At this stage I had painted most of the face already and I had applied a thin layer of Russian Green for the uniform as well as a thin layer of black for the boots:
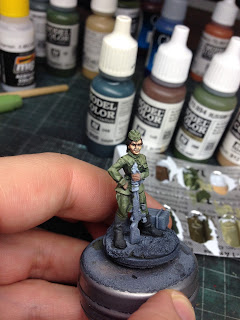
Once I was back to the workbench in my man cave, I continued working on the uniform using the colors on the picture below. Note that I used a blister pack as a palette this time and I applied the same wet blending technique as described in my step-by-step article on Harold, the Canadian Sniper.
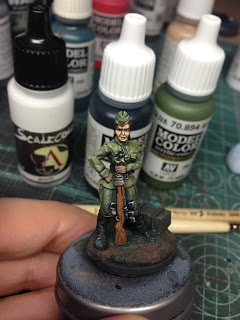
Once I was happy with the uniform, I proceeded to the boots where I used MC Beige Red and MC Dark Sand for highlighting the black and MC Dark Sea Green for adding depth to the shadow areas.
Quick shot of my wet palette with my mix for painting the black boots:
The rifle stock was painted with MC Flat Brown, Mahagony Brown, Orange Brown and Dark Sand. Flat Brown was the base and the other colors where mixed in one after another to paint the wood grain… just paint some random thin lines on. It is actually quite easy once you understand that you just need to paint many thin lines in different brown-ish colors.
Messy pallette. 🙂
Painted the metal parts of the gun in non-metallic metal. So basically I just used Black and White for mixing different shades of grey to simulate light reflections on the metal bits.
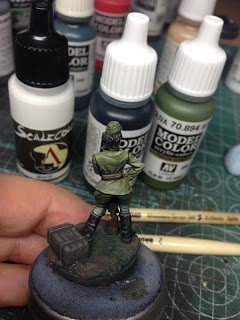
I also started working on the base by just slapping on whatever color I had on my palette + a good brushful of MC Russian Green.
Once that was dry, I drybrushed it a bit with a light-brown-yellow-ish color and then I applied a few different pigments. Some of the pigment was from MIG as you can see below. Other pigments were from pastel chalks that I had bought in a store for artist’s supplies and which I had just scraped off with a scalpel.
I hope you liked this little step-by-step. Feel free to ask questions in the comments section below.
If you are interested in getting your own copy of Liudmylla, hop over to Stoessi’s Heroes Store or check out one of our resellers.









Most impressive! Your take on skin tones is superb.